You are here: PS Series Group Administration > Basic Replication > Managing Replication Partners > Configuring Replication Partners
To configure a replication partner, click:
Replication Partners > Configure partner
A series of dialog boxes appear. Specify the following information:
Note that communication between replication partners is not established until replication is enabled on a volume. Therefore, keep in mind the following issues:
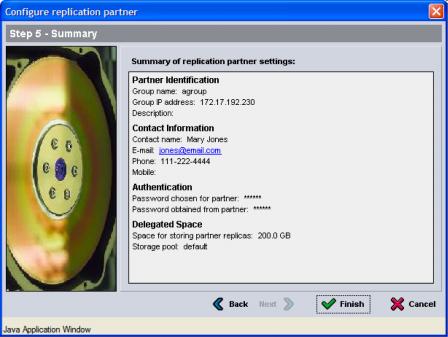
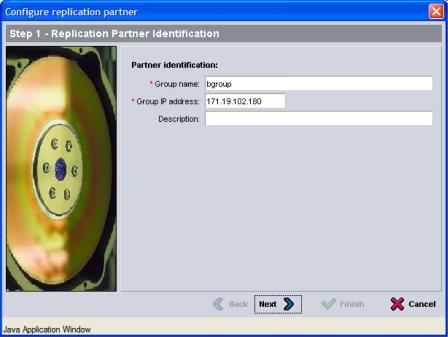
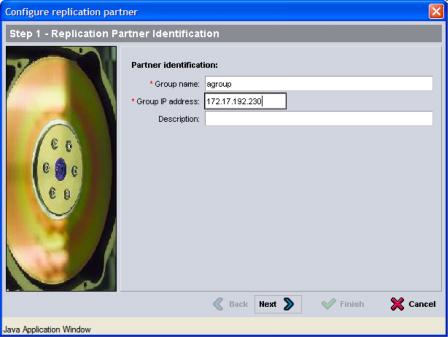
The following figures show examples of using the Group Manager GUI to configure two groups as replication partners. In the examples, AGroup is replicating volumes to BGroup. The figures alternate between AGroup and BGroup, showing each step in the process.
Step 1. Specifying the partner identification. In this step, you specify the partner’s group name, IP address, and an optional description.
Figure 4: Step 1 on AGroup - Partner Identification
Figure 5: Step 1 on BGroup - Partner Identification
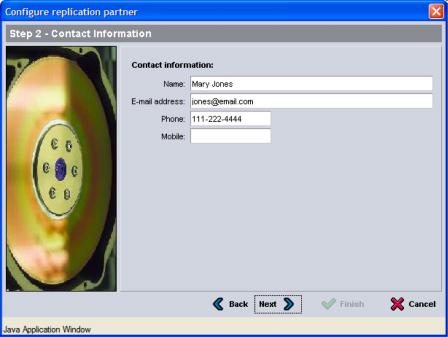
Step 2: Specifying the contact information. In this step, you optionally specify the name, e-mail address, and phone numbers for the partner administrator.
Figure 6: Step 2 on AGroup - Contact Information
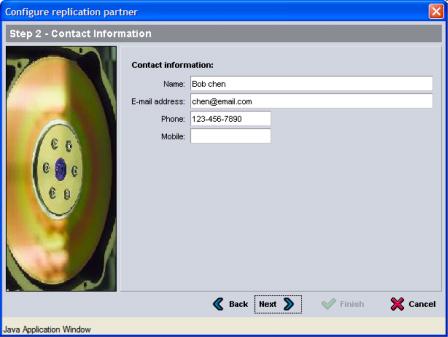
Figure 7: Step 2 on BGroup - Contact Information
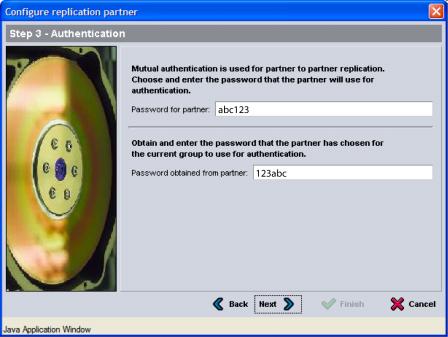
Step 3: Setting the mutual authentication passwords. In this step, you specify the reciprocal passwords for the partners.
In Figure 8: Step 3 on AGroup - Reciprocal Passwords and Figure 9: Step 3 on BGroup - Reciprocal Passwords , the reciprocal passwords are shown to illustrate how to enter the passwords when configuring the partners. In the actual dialog boxes, the passwords will not be displayed.
Figure 8: Step 3 on AGroup - Reciprocal Passwords
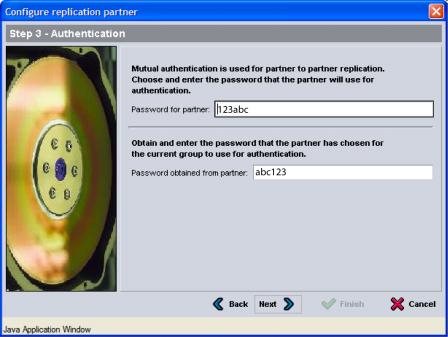
Figure 9: Step 3 on BGroup - Reciprocal Passwords
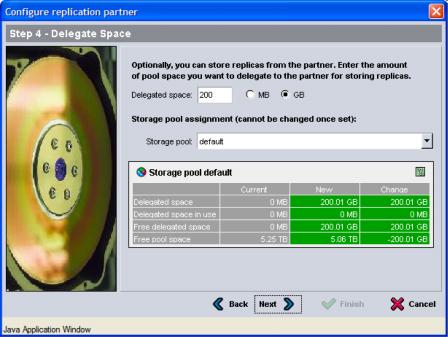
Step 4: Delegating space to the partner. In this step you specify how much space to delegate to the partner. If the delegated space will exceed the capacity of the group, the pool space table cell showing free space will turn red.
Figure 10: Step 4 on AGroup - No Delegated Space
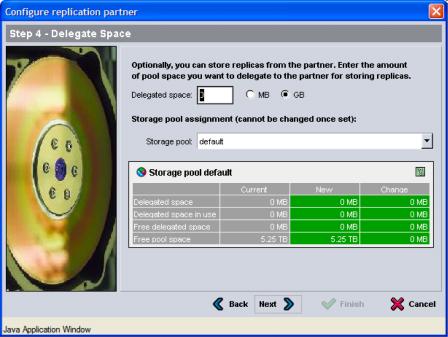
Figure 11: Step 4 on BGroup - Delegated Space
Step 5: Verifying the partner configuration. In this step, ensure that the partner configuration is correct before clicking Finish. To make changes, click Back.
Figure 12: Step 5 on AGroup - Summary
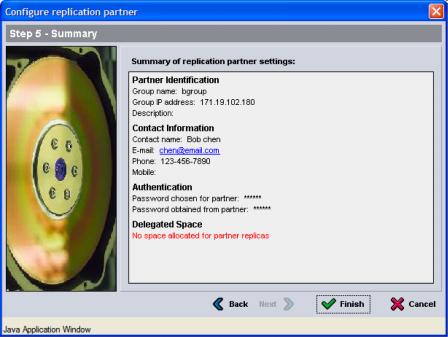
Figure 13: Step 5 on BGroup - Summary