You are here: PS Series Group Administration > Advanced Replication > Recovering Data on the Secondary Group > Demoting a Volume to a Failback Replica Set
After you promote a volume’s inbound replica set to a recovery volume, if the original volume becomes available, you can demote the original volume to a failback replica set and replicate to synchronize volume data across the groups. If you kept the failback snapshot (and it is available), only the volume changes will be replicated. Otherwise, the first replication will be an entire volume transfer.
To demote a volume to a failback replica set, follow these steps:
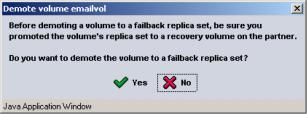
Figure 30: Demote Volume Confirmation
After the demotion, the volume will disappear from the list of volumes, and the failback replica set will appear in the Local Replicas panel of the Replication Partner Inbound window.
At this point, you can configure the recovery volume on the secondary group to replicate to the primary group. When you are ready to return to the original replication configuration, set the recovery volume offline, perform a final replication, demote the recovery volume to the original inbound replica set, as described in Demoting a Recovery Volume to an Inbound Replica Set, and then promote the failback replica set to the original volume, as described in Promoting a Failback Replica Set to a Volume.
If you are switching roles in the replication configuration, you can make the volume demotion permanent, converting the failback replica set to an inbound replica set. You will not be able to promote the inbound replica set to the original volume. See Making a Volume Demotion Permanent for more information.
You cannot delete a failback replica set. Instead, make the demotion permanent and then delete the resulting inbound replica set.